

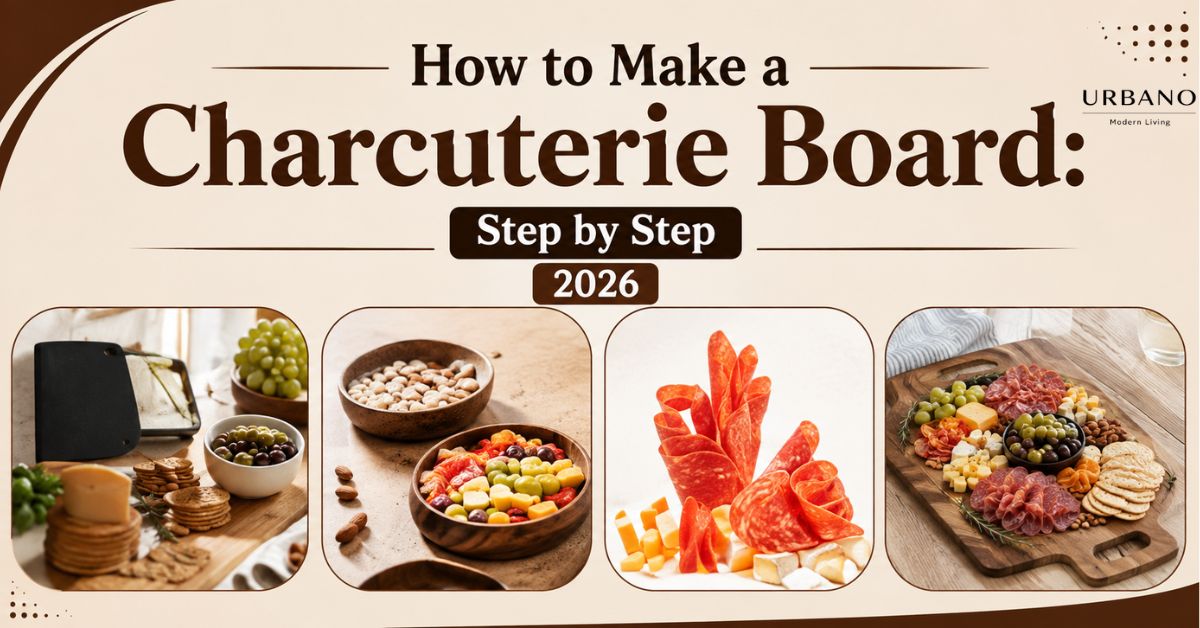
A good board isn’t a pile of nice food. It’s a layout problem with a two hour clock running on it. Learning how to make a charcuterie board takes fifteen minutes. Building one that still looks good ninety minutes into a party, with nothing soggy and nothing warm that shouldn’t be, takes a bit more thought. This article covers quantities per person, board size by guest count, the order things go down in, the food safety window nobody mentions, plus how bowls do the structural work that most boards are missing. The grill tools and serving bowls in the picks are the pieces that make the assembly easier.
Work to three of each: three meats, three cheeses, three sweet or pickled accompaniments, three crunchy things. Allow about 2 ounces of meat and 2 ounces of cheese per person as a starter, double that if the board is dinner. Place the big items first, bowls second, then fill every gap. Put anything wet in a bowl so it can’t soak the crackers.
| Guests | Board area | Meat | Cheese | Bowls needed |
|---|---|---|---|---|
| 2 to 4 | 12 by 16 in | 8 oz | 8 oz | 2 |
| 6 to 8 | 16 by 20 in | 1 lb | 1 lb | 3 |
| 10 to 12 | 18 by 24 in | 1.5 lb | 1.5 lb | 4 |
| 15 plus | Two boards | 2 lb plus | 2 lb plus | 5 plus |
Those figures are for a board served as an appetiser. If it replaces a meal, double the meat and cheese and add bread rather than crackers.
The words get used as if they’re the same. They aren’t. Knowing which one you’re building changes what you buy. Charcuterie means cured meat. A true charcuterie board is meat led, with cheese and pickles supporting it. It suits smaller groups and it’s the more expensive format per head.
A grazing board is the larger table-filling spread, where meat is one element among fruit, cheese, dips, breads and vegetables. It feeds more people for less money and it’s more forgiving to assemble. Most people searching for the first one actually want the second. If you’re feeding ten people for two hours, build a grazing board and call it whatever you like.
Three meats, chosen for contrast rather than variety for its own sake. One thin and delicate, one salty and firm, one spicy. Prosciutto, a hard salami and a spiced chorizo or coppa covers all three textures.
Three cheeses, again by texture. One soft and spreadable, one semi firm you can slice, one hard and aged that shatters when you break it. Brie, a young gouda and a two year cheddar or parmesan works every time.
Three sweet or pickled items. Grapes, dried apricots, fig jam, cornichons, olives, pickled onions. You need both sweet and acid, because the board is mostly salt and fat and the palate tires without contrast.
Three crunchy things. Two cracker types and one nut. Failing that, one cracker plus sliced baguette plus marcona almonds. Keep at least one gluten free option if you don’t know your guests.
Best meats for charcuterie come down to one rule. If it’s already sliced paper thin and you can drape it, buy it. If it needs to be cut into cubes, get the deli to slice it.
Work from area rather than instinct. Around 30 to 40 square inches of board per person as a starter, which is why a 16 by 20 inch board handles six to eight people comfortably. Overloading is more common than under-buying. A board packed edge to edge with no negative space photographs badly and eats badly, because there’s nowhere for a hand to reach in without disturbing everything.
For quantity, 2 ounces of meat and 2 ounces of cheese per person is the appetiser figure. Double it if the board is the meal. Round up on cheese rather than meat, because cheese keeps and cured meat dries out within an hour of being laid out. One more practical point. Buy the cheese as whole wedges rather than pre-sliced. Wedges look better, cost less by weight and they don’t dry at the edges.
Four items from the Urbano Mart kitchen range. An honest note first: the store doesn’t stock wooden serving boards. These are the pieces that go around the board rather than the board itself.
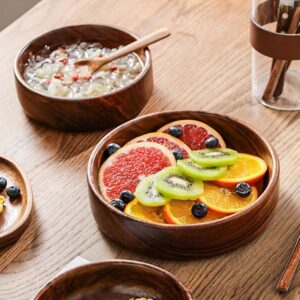
Two solid walnut bowls in a boat shape, 16 centimetres and 20 centimetres across, hand finished so each grain pattern differs. Two sizes matters here: the small one holds olives or cornichons, the large one holds nuts or grapes and gives the board a height change. Hand wash only and never leave them soaking, which rules them out for anyone who wants everything dishwasher safe.
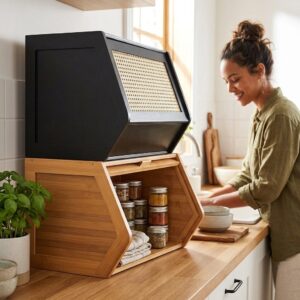
Stackable lidded bamboo boxes, useful for the part of board building nobody photographs. Prep components a day ahead, seal them, stack them in the fridge, then assemble in fifteen minutes when guests are due. It’s a storage product rather than a serving one. It earns its place before the party rather than during it.
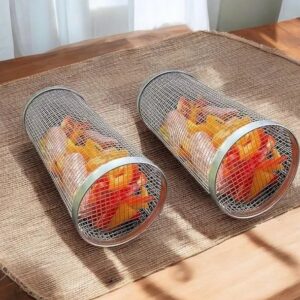
A pair of round rolling baskets for the grilled elements of a summer board: charred peaches, blistered padron peppers, halloumi, marinated mushrooms. Warm items change a board completely and they’re the part guests remember. No use at all for a purely cold indoor board. Skip it unless you grill.
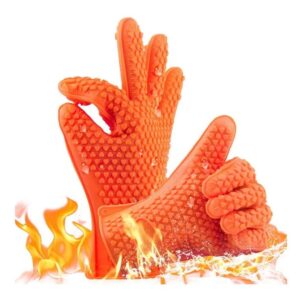
Heat resistant silicone gloves, sold in pairs, for moving hot items straight from grill to board without a detour through a plate. Silicone wipes clean, which matters when you’re handling oily food and then arranging with your hands. Bulky for fine work. Take them off before you start folding prosciutto.
Cheese board arrangement is really just that first step. Get the bowls placed well and the rest falls into position around them.
Here’s the part almost every article on this topic mentions in passing and never explains.
Cured meat and soft cheese are perishable. The USDA treats the range between 40 and 140 Fahrenheit as the temperature band where bacteria multiply fastest. The working limit for perishable food left out in it is two hours. Above 90 Fahrenheit, which covers most summer patios, that limit halves to one hour.
Two hours sounds generous until you count from when the board leaves the fridge, not from when guests arrive.
Three ways to buy yourself more time. Serve in waves, keeping half the meat and cheese in the fridge and rebuilding the board after an hour. Set the board on a rimmed tray with a thin layer of ice underneath for outdoor parties. And put the hard aged cheeses on the board, which tolerate the room far better than soft ones, keeping brie and fresh cheeses for the second wave.
Anything that’s been out past the window goes in the bin rather than back in the fridge. That includes the pretty stuff.
Almost everything can be prepared a day early if you store it separately. Cut hard cheeses, portion nuts, wash and dry grapes, fill your bowls with olives and pickles. Seal each in its own container. Keep the soft cheeses whole until an hour before serving.
Take the board out of the fridge thirty to forty minutes before guests arrive. Cheese served cold tastes of almost nothing. This rest is the single biggest improvement most people can make. Crackers go on at the last moment. Nothing ruins a board faster than a cracker that has been sitting next to a wet olive for an hour.
A grilled element turns a standard board into something people talk about. It works particularly well when you’re already cooking outside. Halloumi takes a grill better than any other cheese because it holds its shape. Peaches, apricots and figs caramelise in two minutes a side. Padron or shishito peppers blister quickly and add heat without much work.
Keep the warm items grouped at one end rather than spread through the board. They release moisture. A warm fig sitting on a cracker is a soggy cracker within minutes. If you’re grilling anyway, clean the grates first. Charred residue from last week transfers straight onto delicate food. Something like the Electric Grill Brush Rechargeable handles that in a couple of minutes rather than ten with a wire brush.
Everything laid flat. Height comes from folded meat, stacked crackers and bowls at different levels. A flat board looks like a plate of ingredients.
Wet items loose on the board. Olives, pickles and marinated peppers leak. Bowls exist for this exact reason.
One cheese doing all the work. Three textures is the minimum for a board to feel considered.
Too much board showing. Or none at all. Both read as wrong. Aim to cover roughly ninety percent of the surface.
Serving it fridge cold. Thirty minutes on the counter changes the flavour of every cheese on the board.
One reader built a beautiful board for twelve at a summer barbecue and watched the brie collapse into a pool within forty minutes in the heat. Rebuilding around aged cheeses, with the soft cheese held in the fridge as a second wave, solved a problem they’d assumed was the cheese’s fault.
Another kept running out of food at parties because they were buying by feel. Working from 2 ounces of meat and 2 ounces of cheese per head, on a 16 by 20 inch board for eight, gave them a board that lasted the evening rather than twenty minutes.
The Urbano Mart Team covers kitchen, barbecue and entertaining products for customers across the United States, from a business formed in Michigan in 2022. Serveware and grill accessories are the busiest part of this range through summer. Every product specification quoted here comes from the live product pages the team ships from.
Knowing how to make a charcuterie board comes down to four things. Three of everything for contrast, roughly 2 ounces of meat and cheese per person, bowls placed first to give the layout structure. A clock that starts the moment the board leaves the fridge. Get those right and the rest is arranging. Browse the kitchen and BBQ accessories or contact Urbano Mart at sales@urbanomartllc.com or +1 313 487 8379, Monday to Friday, 9:00 AM to 5:00 PM EST. Free shipping applies across the USA except HI, PR, AK and GU, with delivery in 5 to 8 working days.














&url=https://urbanomartllc.com/product/silicone-bbq-gloves-heat-resistant-oven-mitts-barbecue-grill-gloves-for-cooking-baking/&media=https://urbanomartllc.com/wp-content/uploads/2025/10/Silicone-BBQ-Gloves.jpg)
&url=https://urbanomartllc.com/product/stainless-steel-rolling-grill-basket-round-grill-basket-for-bbq-veggies-fish-meat/&media=https://urbanomartllc.com/wp-content/uploads/2025/10/Stainless-Steel-Rolling-Grill-Basket-7-1.jpg)