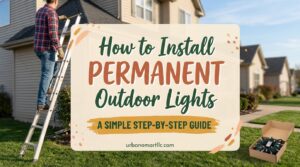

Learning how to install permanent outdoor lights is the difference between a roofline that glows for years and a string of lights that comes down every January. Permanent outdoor lights mount once and stay up all year, so the work pays off at Christmas, Halloween, summer parties, and ordinary evenings alike. This guide walks you through how to install permanent outdoor lights from the first measurement to the first scene you pick in the app.
Once you know how to install permanent outdoor lights, the job is mostly planning. The mounting itself is simple: a run of lights fixed to a roofline, patio edge, or garage trim with adhesive backing and screw clips, plugged into an adapter, and controlled from your phone. Most of this guide is about getting the plan right, because a careful plan is what makes the finished result look like it belongs on the house.
Before You Start: Measure and Plan Your Run
The first step in how to install permanent outdoor lights is measuring, not mounting. Walk the house and decide where the lights will run: along the front roofline, around the gables, under the eaves, along a patio beam, or across the garage trim. Measure each section with a tape measure and add them together, so you know your total before you start — and where the run begins and ends.
Look for the nearest outdoor outlet before you fix anything in place. The run starts at the power end, so the adapter needs to sit within reach of an outlet and the first section needs to reach from the adapter to the start of the run. When you plan how to install permanent outdoor lights, the outlet decides where the run starts — so sort the route out on the ground, not halfway up a ladder. Check the manual in the box for how the maker intends the adapter and the first connector to be placed.
Decide on your mounting surface while you are still on the ground. Smooth, clean surfaces hold adhesive backing well; rougher surfaces need the screw clips to do more of the work. Wipe the mounting line clean, and install on a dry day if you can. Gather a tape measure, a sturdy ladder, a drill for the screw clips, and the accessory bag before you climb.
How to Install Permanent Outdoor Lights in 7 Steps
These seven steps cover the whole job for a typical house. Work slowly, test as you go, and do not fix the last clip until you have seen the lights on.
- Step 1 — Measure and map the run. Measure every section of roofline, eave, patio, or garage trim where the lights will go, and write the numbers down. Mark the start and end points, and note every corner, gable peak, and downspout the run has to pass. This map is the plan for how to install permanent outdoor lights on your house.
- Step 2 — Test the lights before you mount them. Lay the string out on the ground, plug in the adapter, and switch the lights on. Check that every section lights up and that the app connects over Bluetooth before a single clip goes on the house. Finding a dead section on the ground takes a minute; finding one after the run is fixed to a roofline takes an afternoon. Learn how to install permanent outdoor lights the patient way, and test first.
- Step 3 — Start at the power end. Begin mounting at the end nearest the outlet, so the adapter and first connector sit where they belong. Work away from the power end, keeping the string snug but not stretched tight, and leave a little slack at corners.
- Step 4 — Fix with adhesive, then screw clips. Press the adhesive backing onto the clean mounting surface to hold each section in place, then fix the screw clips with pre-drilled holes to lock it down. The adhesive does the positioning and the clips do the holding, and the two together keep the run straight through wind and weather. Space the clips evenly, add an extra clip on either side of every corner so the run does not sag where it turns, and use both fixings every time: that is how to install permanent outdoor lights so the run stays straight for years.
- Step 5 — Cut or extend to fit. If the run is too long, cut the string at a connector point and cap the end as the manual shows. If it is too short, extend it at a connector point up to the 200FT limit. Never cut between connector points, and never force a section to reach.
- Step 6 — Plug in and power on. Plug the adapter into the outdoor outlet, switch the lights on, and walk the full run from the ground to check every section is lit and every corner sits neatly. Check it from the street too — that is the view you will live with. Fix any sagging section now, while the ladder is still out, and you will have finished the hard part of how to install permanent outdoor lights.
- Step 7 — Set up the app and pick a first scene. Open the app over Bluetooth, pair the lights, and pick a first scene — warm white shows the full run clearly. Set a timer, and save the scene you like. That is the whole job: measure, test, mount, cut to fit, plug in, and set up the app.
How to Install Permanent Outdoor Lights on Different Surfaces
The steps above work everywhere, but the surface changes the details.
- How to Install Permanent Outdoor Lights on a Roofline A roofline is the classic spot, and it is also the one where planning matters most. Work along the fascia or the edge of the eaves, following the line of the roof rather than fighting it. At a gable peak, follow the peak up and over, with a clip on each side so the line stays sharp. Keep a consistent distance from the edge — a wandering line is the first thing people notice from the street.
- How to Install Permanent Outdoor Lights on a Patio or Garage. Patio beams and garage trim are lower and more forgiving than a roofline — a good place to start your first install. The same rules apply: clean, press the adhesive on, then fix the screw clips. On a garage, run the lights along the top trim so the door still opens freely, and keep the adapter clear of the door track. On a patio, run them under the beam rather than on top of it, so the light washes down over the seating area.
- How to Install Permanent Outdoor Lights Around Corners. Corners are where installs go wrong, so give them a little extra care. Leave a small loop of slack at each corner instead of pulling the string tight around it, and fix a clip on both sides of the turn so the corner holds its shape. If the corner is sharp, check the manual for whether the string bends there or needs a connector to make the turn. A neat corner is the difference between an install that looks professional and one that looks improvised.
- Setting Up the App and Remote. Once the lights are mounted and plugged in, setup takes a few minutes. Open the app on your phone, pair the lights over Bluetooth, and the app will find the run without any account registration — guest mode works straight away. From the app you can change colors, pick from the 70+ preset scenes, set timers so the lights come on and off by themselves, and group zones so different parts of the house can run different scenes. The included remote does the same basics without the phone.
Start simple on the first night. Pick one scene, set one timer, and live with it for an evening before you start building custom combinations. The timer is the feature most people use most: lights on when you get home, off when you go to bed, without touching a switch. That is all there is to it — the physical work of how to install permanent outdoor lights ends at the outlet, and everything after that happens on your phone.
The Kit Behind This Guide
If you want a kit that makes how to install permanent outdoor lights a single-afternoon job, this guide is written around the Permanent Outdoor Lights – 200FT RGB LED. It is a 200FT run with 72 lights, 16 million colors, 70+ scenes, and music sync through a built-in microphone, controlled from the app or remote. The string cuts and extends to 200FT at the connector points, mounts with adhesive backing plus screw clips, and is IP67 waterproof for -4°F to 140°F, so one install stays up all year. It runs on 36W corded electric power and carries a 2-year manufacturer warranty.
Year-Round Use: One Install, Every Season
The point of learning how to install permanent outdoor lights is that you only do it once. The same run that glows red and green in December can run warm white for a quiet evening, bright colours for a summer party, or orange and purple for Halloween — just change the scene in the app. The 70+ preset scenes cover the holidays without new hardware, and music sync moves the lights with the music at a gathering.
Seasonal changeover takes about a minute: open the app, pick the scene, done. There is no ladder, no storage box, and no untangling in the cold. That is the real payoff of knowing how to install permanent outdoor lights — not the lights themselves, but the fact that the work is finished and the decorating becomes a tap on a phone.
Common Mistakes to Avoid
The most common mistake people make when they learn how to install permanent outdoor lights is skipping the ground test in Step 2 and mounting the whole run before switching it on. The second is measuring by eye, which leaves the run short at the far end or long with nowhere for the extra length. The third is relying on adhesive alone and skipping the screw clips — adhesive positions the run, but the clips hold it through wind, rain, and summer heat.
Two more mistakes are worth avoiding. Do not stretch the string tight between clips; a little slack keeps the run neat and makes corners easier. And do not set up the app before the lights are plugged in and tested — pair the app once, after the physical install is done. If you avoid those five mistakes, your first lesson in how to install permanent outdoor lights will look like your third.
Frequently Asked Questions
How long does it take to install permanent outdoor lights?
Most single-storey runs take one afternoon, measuring and planning included. A 200FT run on a two-storey house with several gables can take a full day, mostly ladder work. The ground test in Step 2 adds minutes and saves hours — do not skip it.
Can I cut the lights to fit my house?
Cutting is one of the first things people ask about when they learn how to install permanent outdoor lights. Yes — the string is cuttable at the connector points and extendable to 200FT, so you trim it to your roofline instead of buying a fixed length and hoping. Cut only at a connector point, as the manual shows.
Do permanent outdoor lights work in rain and snow?
Yes — this kit is IP67 waterproof and UV-resistant, rated from -4°F to 140°F, so rain, snow, and summer sun are all within its working range. The lights are made to stay mounted all year. Keep the adapter out of standing water, and follow the placement guidance in the manual.
Can I install permanent outdoor lights myself, or do I need a professional?
The kit is made for DIY installation, and this guide covers how to install permanent outdoor lights without hiring anyone: adhesive backing and screw clips for mounting, cutting and extending at the connector points, and app setup over Bluetooth with no account needed. If your roofline needs a tall ladder, if you are not comfortable working at height, or if your home has unusual wiring, hire a professional for the ladder work.
How do I change the colors after installation?
After you learn how to install permanent outdoor lights, changing colours is the easy part. Open the app over Bluetooth or use the included remote. The app offers 16 million colours and 70+ preset scenes, plus timers and group zones, so you can set the whole house to one scene or run different scenes on different parts of the house. The music sync uses the built-in microphone to move the lights with the music at a party.
Conclusion
Now you know how to install permanent outdoor lights the way that lasts: measure first, test on the ground, mount from the power end with adhesive and screw clips, cut or extend at the connector points, plug in, and set up the app. It is a single afternoon of work for a roofline that glows every night — and that is the whole point of learning how to install permanent outdoor lights instead of hanging temporary ones.
Take one thing from this guide: the ground test. Everything else can be fixed from a ladder, but a dead section found after mounting turns an afternoon job into a weekend. Measure, test, mount, and enjoy the lights.